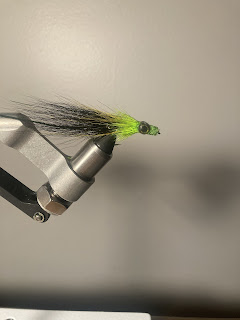
Tying a deer hair streamer
This is a fly pattern that I recently came up with to target bass in the spring and summer. I tied it with a hidden cone head to give it weight which allows you to put a deer hair head on the fly and still have it sink. This fly was designed to be fished on a sinking line to prevent it from jigging in the water column but you can probably make it work on a floating line as well but this will give the fly a different action. I recommend fishing this fly when the water is slightly off color so that you can fish it fast and keep it in the middle of the water column.
Materials needed:
Thread(I used gsp for this fly but feel free to use any strong thread of your choice)
Rabbit zonker strip
Rubber legs
Craft fur
Deer hair
Conehead
Any size streamer hook
Step 1: slide your conehead onto the hook. You’ll want this to be facing forward. Then start your thread behind it and bring it to the start of the hook bend

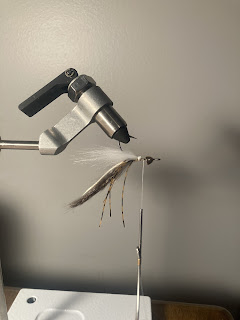
Step 2: tie in your rabbit zonker strip. The length can be determined based on the forage in your area and the size hook your using. Then tie in 2 rubber legs on top of that making sure to keep your thread even. You don’t want to make a ramp of thread in front of the zonker strip so I reccomened using the v tie technique. You can learn this technique in a post we did earlier


Step 4: bullet tie the craft fur stack and turn your fly back over. Keep this stack neat to leave a good space to tie on some deer hair
Step 5: tie in a small amount of deer hair directly on top of the craft fur and make sure you make even thread wraps and clean the area without leaving a thread ramp. This will make it easier to slide the conehead against the bump. You can then whip finish and cut your thread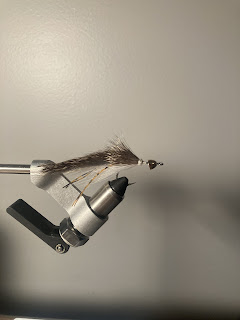
Step 6: place a bit of glue on the thread covering the deer hair and craft fur then shove the conehead against the thread bump and glue to set it into place. Then you can start your thread again and make a small thread cone in front of the conehead to ensure it does not move
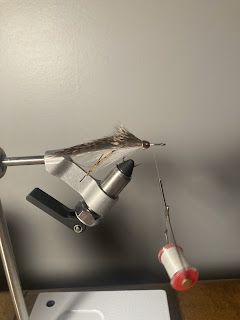
Step 7: this is probably the hardest step so don’t get frustrated if you don’t get it perfect. You’ll want to tie in a deer hair collar on top of the hook and another on the bottom. I used white on the bottom to match my craft fur stomach but you can use the same color for the whole fly. Don’t use a lot of deer hair on the collars and try to not take up so much room when you do this step. Once you’ve got the collars locked in place move your thread directly in front of the stack and spin a deer hair clump around the hook. This is a difficult process to learn so I will include a link to videos showing you how to stack collars and spin deer hair at the bottom of this post. Once you’ve spun the deer hair wiggle your thread through the stack and try not to trap hairs in the process. You can then while finish and cut your thread

Step 7: turn the fly over to the bottom and trim the underside flat. Try and make this cut as clean as possible using a razor blade. Cut as close to the hook shank as you can without cutting your thread. Make sure to not cut into the bottom collar

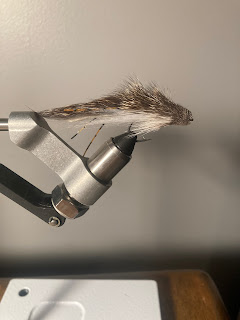
Step 8: trim the sides flat with scissors or a razor blade and then trim the top of the fly with a slight angle to bleed the deer hair into the collar. Take your time with this step because you can’t put more back on but you can definitely take to much off so work slowly and don’t rush it. You can then round out the corners on the top of the fly to clean it up and your fly is now complete

This fly is definitely one of the harder flies we’ve shown on this blog site considering the intricate deer hair work but with some practice and patience you’ll get it eventually. If you’ve been following our posts you know we did a diver fly and a zoo couger so if you’ve mastered those patterns this one shouldn’t be to hard but I will still include links on how to spin and stack deer hair at the bottom of the post.
Link for stacking deer hair
Link for spinning deer hair
If you liked this post please consider checking out our other posts and if you want to you can leave a comment requesting a fly pattern you would like to see us tie in future posts


Comments
Post a Comment