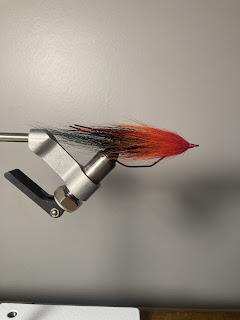
Tying a reverse bulkhead swimbait style
The reverse bulkhead is a pattern that was developed by Bob Popovic and he is well known around the fly tying world for his skill with bucktail. This fly is super fun to fish for bass, pike, and just about any predatory fish both freshwater and saltwater. I’ve found these flies to be most effective with a long steady strip followed by a quick tug, and then a pause.
Materials needed:
Small hook or shank
Pr378 swimbait hook
Thread color of choice
Bucktail
Flash of choice
50-60lb monofilament
Adhesive of choice(optional)
Step 1: secure your thread to the shank and tie a piece of 50-60lb monofilament pointing straight off the hook


Step 4: move your thread up the hook shank and tie in another slightly denser but shorter stack of bucktail with the tips pointing off the hook

Step 5: use your fingers or a hollowed out pen to reverse the bucktail and build a thread dam to push the hair back. It’s ok to collapse this first stack a little because it’s on the rear of the fly

Step 6: move a little further up the shank and repeat the previous step but make sure to use slightly more bucktail and shorten the stack again. This should leave you at the eye of the hook. Whip finish and secure with adhesive(optional)

Step 7: secure your Pr378 in your vise and attach the end of the monofilament from the shank to the hook. Tie it in just far enough that 2 stacks of bucktail will fit on top of the monofilament. This will ensure that the head of the fly is clean and easier to work with

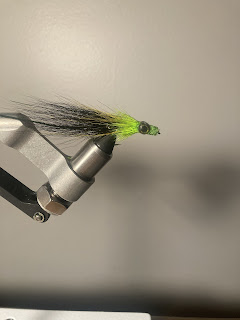
Step 8: tie in a stack of bucktail in the same manner as before right at the back of the hook shank. I changed colors in this step, however it is optional. Also add 2 more strands of the large flashabou to help bridge the gap in shanks


Step 10: repeat the process shown in step 9 twice, but again increase density and shorten the length. I changed colors again here but it is optional. This last step should leave you at the hook eye so you can whip finish and secure with adhesive

Step 11: run your fly under warm water and hang dry to set the silhouette. This step will remove the memory from the bucktail and the hair will relax as it hang dries.
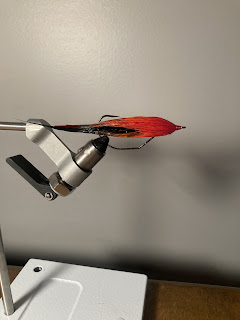
I recommend fishing this fly through thick cover and weeds as well as in open water depending on the color and body of water you are fishing. This fly is completely weedless and rides hook point up.
Here are a few links to videos explaining the techniques I used for this fly. The first one is on thread control and hollow tying and the second one is a video on finishing hollow ties.
https://youtu.be/8DjXharsmxk
If you likes this post please consider checking out our other posts as well.


Comments
Post a Comment